How do you create your first schedule in a calendar app?
With a new calendar app, the first obstacle is often deciding what to enter first rather than finding a missing feature.
You don't have to fill in all the fields from the first schedule. A schedule can do its job well if you just set the date and what you need to check next.

1. Choose the Calendar First
When you click ‘Register’ at the bottom center of the ILJI screen, a screen to create a new schedule will open.
At the top right, you will see the calendar where the schedule will be saved.
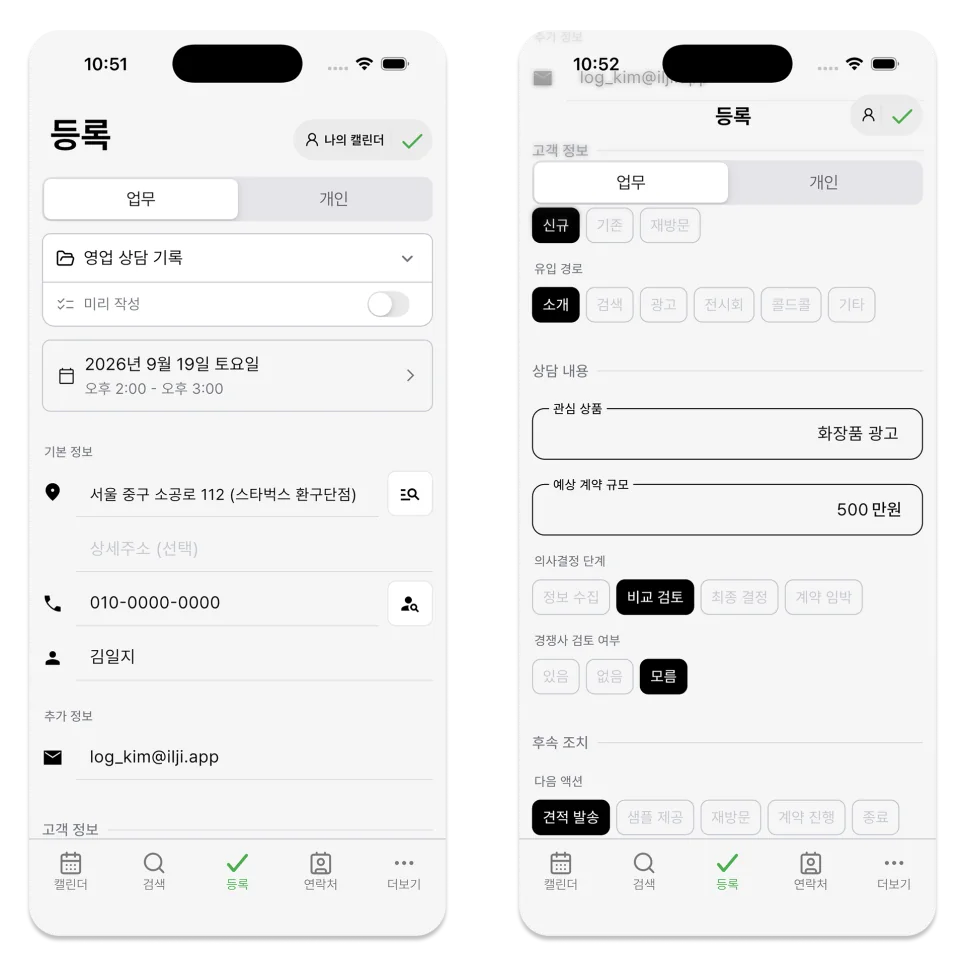
Save it to My Calendar for your own schedule or to a team calendar for work the team can see together.
If you use several team calendars, confirm the calendar name before creating the schedule.
2. Choose Personal or Work
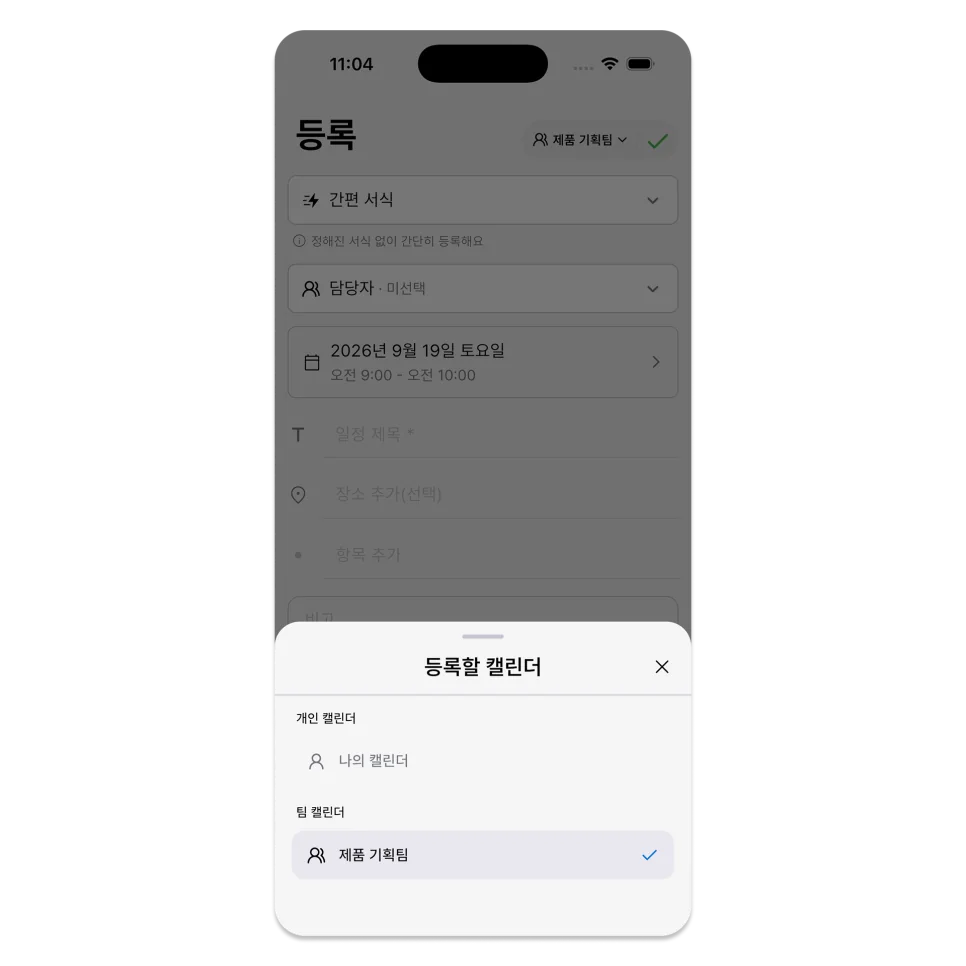
In My Calendar, you can choose between your personal calendar and your work calendar.
Add appointments and everyday tasks quickly with a title, date, and location.
If you need fixed fields, checklists, or progress records, choose Work and select the appropriate work form.
If you choose a team calendar, the schedule type automatically switches to Work.
3. Set the Date and Time
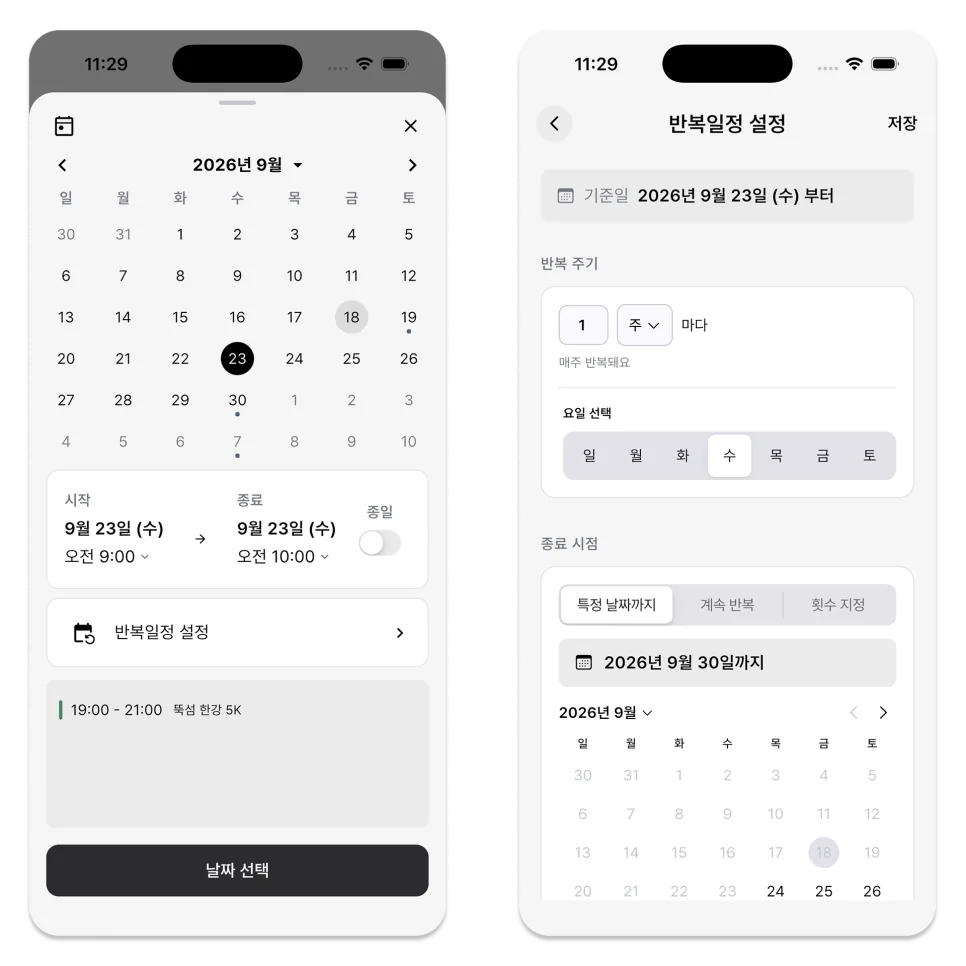
You can set the start date and time by pressing the date area.
Choose All day when a time is unnecessary. If the schedule has a fixed finish, enter the end time too.
For schedules that span several days or recur regularly, add an end date or recurrence from the same date settings screen.
When you first sign up, it's simple to test it out with just one thing you need to do today or an appointment near you.
4. Add Only What You Need
A personal schedule needs a title. Add a location, checklist, and notes only when useful.
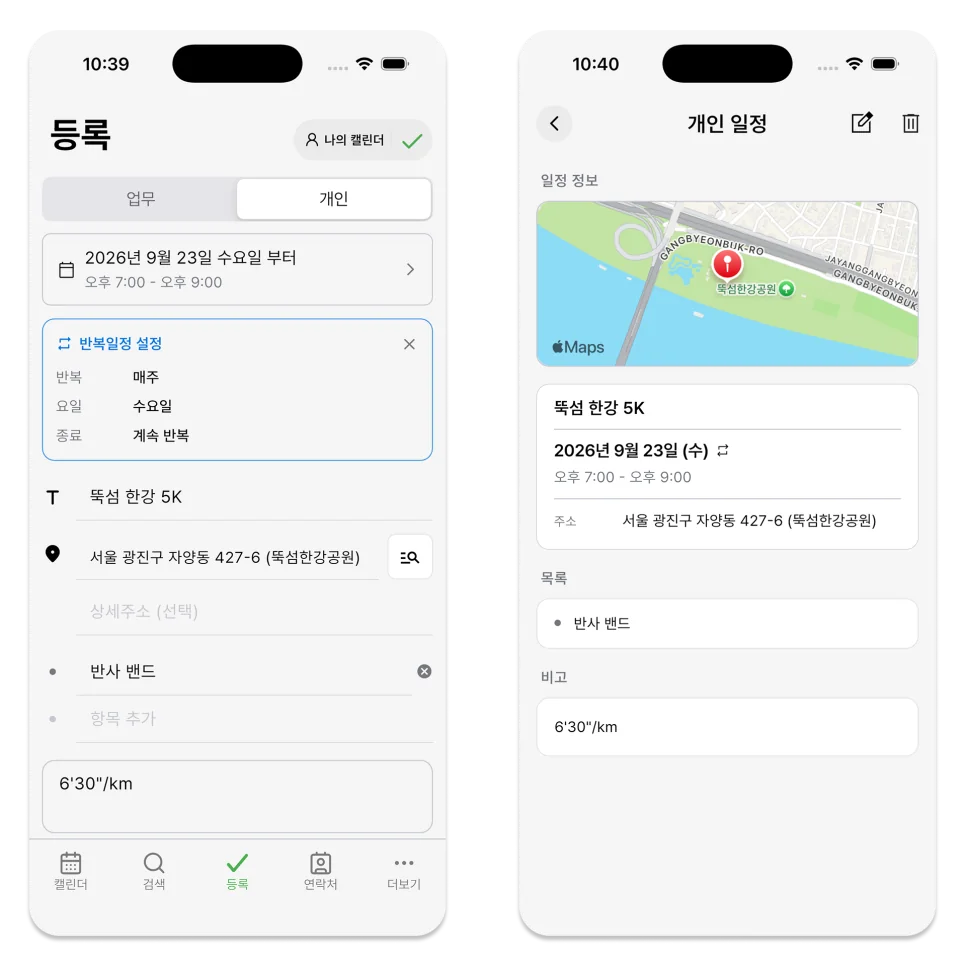
For the work schedule, first select a format.
In the Quick form, you can enter the title, location, to-do list, and notes, and in the work form you created yourself, the content you have set, such as name, contact information, address, amount, or additional items, is displayed.
5. Save with the Checkmark
When you enter the registration screen, the + icon in the bottom center changes to a check icon.
After completing the input, click the check icon to save the schedule and open the details screen for the new schedule.

If you go back, you can check the calendar for the saved date.
What to check when it is not saved
If you click the check icon but it is not saved, look at the following items in order.
- A personal schedule has a title
- A work schedule has a selected form
- Every required field is filled in
- A team schedule has an internet connection
If something required is missing, the Add icon changes to a failed state and ILJI shows what needs attention.
Your first schedule does not have to be complicated.
Start with a nearby appointment, then check how its date and time appear on the calendar.
Add recurrence, work forms, or team calendars later when the schedule actually needs them.
If you register the schedule you need to check today in ILJI, future functions will be much easier to understand.